A clothes dryer is a modern-day necessity—something we often take for granted until the wet clothes just won’t dry or the laundry room starts to feel like a sauna. But behind every load of fresh laundry is a crucial system at work: your venting for dryer setup.
Proper dryer venting isn’t just about performance. It’s about protecting your home from fire hazards, reducing energy usage, and preventing excess moisture that can lead to mold and water damage. Whether you’re using an electric or gas dryer, ensuring your dryer vent and clothes dryer exhaust duct are installed and maintained correctly is essential for both safety and efficiency.
Let’s explore how dryer venting works, why it matters, and how you can optimize your system to protect your home and save money.
How Dryer Venting Works
When you run a clothes dryer, it generates heat to evaporate the moisture in your clothing. That moist air—along with dryer lint and hot air—must be expelled from your home via an exhaust duct system. This system starts at your dryer, travels through a transition duct, and ends at an exterior wall where the exhaust vent releases air outdoors.
The entire process relies on consistent, unrestricted airflow. Blockages from trapped lint, crushed ducting, or improper installation can trap heat and lint inside the system, creating a serious fire hazard.
Why Proper Dryer Venting Matters
1. Safety First
According to the U.S. Fire Administration, thousands of home fires each year are caused by clothes dryers, primarily due to lint buildup in the dryer duct or vent. Lint is highly flammable, and when it clogs ducts, it traps heat and causes the dryer to overheat.
A properly installed and maintained dryer venting system can significantly reduce this risk.
2. Save Energy and Money
When the exhaust air is restricted, your dryer must work harder and run longer to dry a load. This means higher energy costs and unnecessary wear and tear on your dryer. Optimizing airflow helps the dryer vent works efficiently, saving both time and money.
3. Protect Your Home
Blocked vents lead to moisture retention in the laundry room, encouraging mold, mildew, and water damage. You may also experience backflow of hot air into your living space. All of this can lead to health issues, damaged walls, and flooring.
Understanding Dryer Vent Components
To optimize your venting system, you must understand its core components:
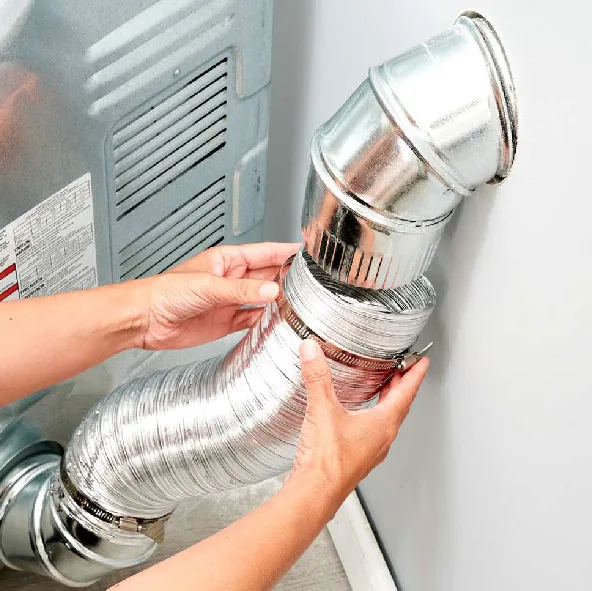
- Transition Duct: Connects the dryer to the wall. Should be semi-rigid metal duct or rigid metal duct, not foil or plastic.
- Clothes Dryer Exhaust Duct: The full exhaust duct run from dryer to the exterior. Should be rigid metal for the least resistance to airflow.
- Exhaust Vent: Located on the home’s exterior, allows hot air and lint to exit. Should include a hood or flap to prevent backflow and pests.
- Backdraft Damper: Prevents outside air from entering back into the duct.
- Lint Filter: Built into most dryers to catch lint before it enters the vent system. Should be cleaned after every load.
Installation Guidelines
1. Use the Right Materials
Never use plastic or foil venting. Only use rigid metal duct (preferred) or semi-rigid metal duct for the transition duct. These resist crushing and are easier to clean.
2. Mind the Length
Keep your total dryer duct run under 35 feet. Each 90-degree bend adds resistance and counts as five additional feet. More bends = more airflow restriction.
3. Secure Connections Properly
Use similar fasteners or screws, not duct tape inside the ducting. Over time, tape fails due to heat and moisture.
4. Vent to the Outside
Always vent the dryer to the exterior wall—never into an attic, crawlspace, or garage. The moist air and dryer lint must exit the home entirely to prevent fire hazards and mold growth.
How to Maintain Your Dryer Venting System
Even the best-installed vent systems require regular maintenance. Here’s a step-by-step guide:
Step 1: Disconnect and Inspect
Pull your dryer away from the wall, disconnect the duct, and inspect it for lint, dust, or blockages.
Step 2: Vacuum and Clean
Use a vacuum with a hose or a dryer vent cleaning kit to reach inside the duct and remove dryer lint. Don’t forget to clean the lint filter and the area around the duct termination outside.
Step 3: Check the Exhaust Vent
Make sure the hood opening outside is clear and the flap opens easily. Use a brush if needed to clean the interior.
Step 4: Inspect for Damage
If you notice crushed ductwork, excessive bends, or outdated materials, replace them. Look for clogs, cracks, or signs of water around the exhaust vent.
When to Consider Upgrading or Replacing
You should replace your dryer vent system if:
- It’s made of plastic or foil.
- It exceeds the safe length for your model.
- You smell burning or feel excessive heat around the dryer.
- Laundry isn’t drying properly even with a clean lint trap.
A Note About Ventless Dryers
Some compact or ventless dryers are designed without the need for external venting. These models condense the moist air and collect water vapor in a reservoir. While convenient for small spaces or apartments, they are typically less energy-efficient and slower to dry.
If your home allows, always choose a vented dryer with a proper exhaust system to get the best performance.
Final Thoughts: Dryer Venting = Home Safety
Your dryer venting system isn’t just a pipe to the outside—it’s a key part of your home’s safety and energy efficiency. Poor airflow, trapped lint, and improper materials can increase your energy bills, slow down drying, and put your family at risk.
Stick to rigid metal ducting, maintain a clear air path, clean the dryer duct regularly, and follow all manufacturer’s recommendations for best results.
It’s a small effort that protects your investment, saves money, and keeps your laundry routine running smoothly.